We have probably all met a caravanner who has rigged up their own awning clothesline. In fact, you might’ve rigged your own as well. But what if I told you there is a portable, lightweight and rather clever clothesline system designed to be attached to most roll-out awnings available? It requires no screws and no drilling into the roll-out awning tube, and it’ll easily accommodate four large bedsheets, depending on the size of your awning. I’m talking about the All-In-One RV Clothesline by Queensland-based company ReverseMate, the company behind the ReverseMate caravan reversing aid.
I had the opportunity to try this clothesline during a quick trip away with a Goldstream. Here’s what I thought…
SETTING UP THE ALL-IN-ONE RV CLOTHESLINE
The kit includes two brackets that are shaped to grip the circular awning barrel, 15m of clothesline wire, four hand knobs and two tensioners (one is a spare). With the awning rolled out to your preferred pitch, the first thing you need to do is decide whether you want to set-up the clothesline on the outside of the awning, or underneath. The fact the All-In-One RV Clothesline can be set-up under the awning is a brilliant feature, and it’s just as easy to do it this way as it is to set it up outside of the awning. More on that later.
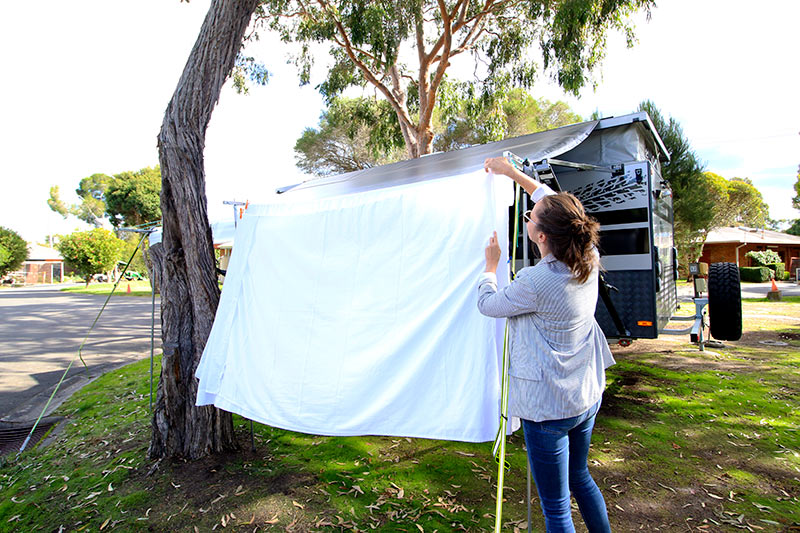
Each of the two aluminium brackets has a tongue that slides into one of the awning’s grooves. With both brackets fitted either end, close to the support arms, it’s just a matter of tightening the black knob on each. Each bracket also has a special ‘arm’, to which the supplied clothesline is secured. These arms are highly adjustable, so finding level isn’t too difficult. Once you have the brackets fitted and the arms have been adjusted to the best position, you can now fit the clothesline wire.
Now, this is probably the fiddliest part of the process but, in truth, once you’ve done it once or twice, I think you’ll find it quite easy. It’s a case of feeding the line through one side of the clothesline arms, with a knot tied at one end of the line, through a supplied aluminium central support bracket, through the arm at the other end, and back the other away. The trickiest part is maintaining tension on the line as you feed it through the two arms and central bracket. But, again, it’s actually not too difficult and a plastic tensioner is provided to secure the line. Because 15m of line is provided, you’ll need to cut it on first use to suit your needs after it has been secured.
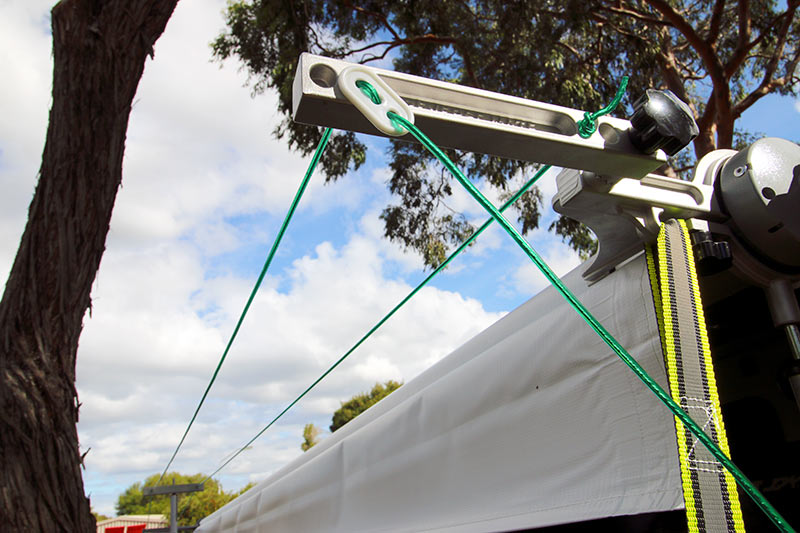
Naturally, wet clothes can be a little heavy. That’s why each of the arms of the two brackets, as well as the central bracket, have a special in-built cradle to accommodate a tent pole. Tent poles aren’t supplied with the kit, but it’s the sort of thing you might have in your kit anyway. If not, they aren’t expensive. Simply adjust each pole to the required height and secure with guy ropes. And yes, each of the two side brackets have built-in tie-down clips! Some awning brands have their own support poles built-in so there is no need for tent poles. Once you’ve set up this awning a couple of times and you have the gist of it, I reckon it would take you no more than five minutes to set up.
PRIVACY SCREENS
It is no more difficult to set up the All-In-One RV Clothesline underneath the awning. Now, it’s fair to say that simply hanging up your clothes under an awning won’t completely protect them from hard rain. However, it might buy you a little extra time to get your clothes dry when the rain starts.
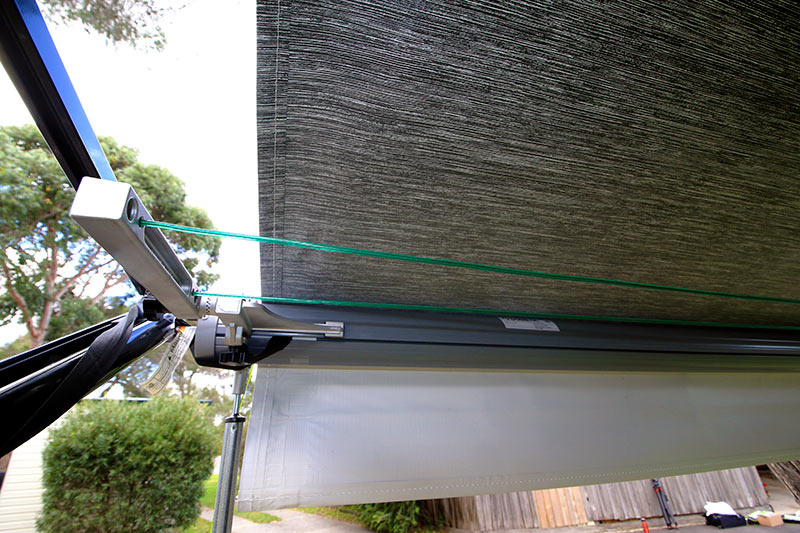
Further, a lot of vanners travel with privacy screens that fit the awning barrel via the same groove that the brackets of this clothesline use. It’s important to note that you can still use your privacy screen with this clothesline in place. In fact, by setting up the clothesline under the awning with a screen in place, you have a better chance of keeping some more delicate articles of clothing private, with the screen also providing your clothes just a little extra protection from the elements too.
The All-In-One RV Clothesline is designed to work with all popular roll-out awnings on the market, including those by Dometic, Aussie Traveller and Carefree. At 8mm in diameter, the Carefree awning barrels are a couple millimetres narrower than other awning barrels, so Reverse Mate includes 2mm-thick rubber strips in the kit to act as packing material. The clothesline brackets will not fit a 70mm awning barrel.
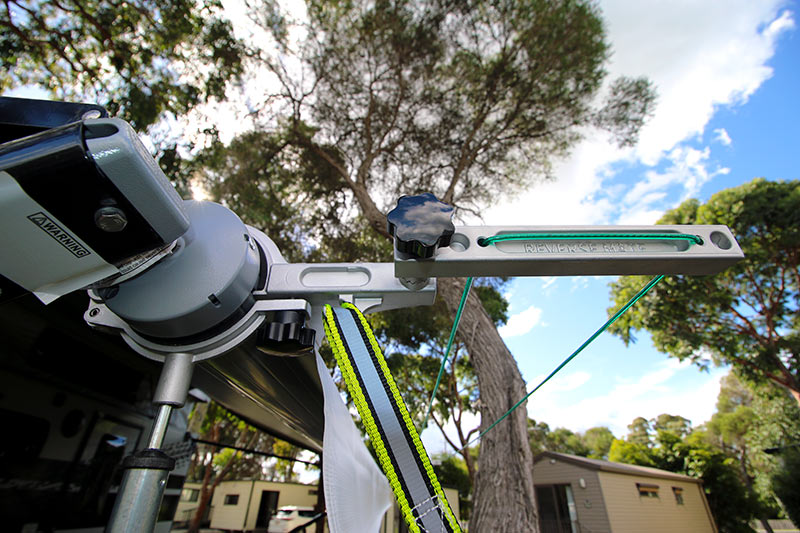
So, what did I think? I was impressed, first and foremost, by the cleverness of this system. The brackets fit snuggly around the awning barrel, and everything appears to be well made. Setting up any camping clothesline can be fiddly, but the All-In-On RV Clothesline (which has an introductory price of $229.99) makes it as easy as possible. The fact that it doesn’t require drilling or the securing of permanent brackets into the awning arms makes it a winner, too. If you’ve struggled with how best to dry your clothes when on the road, I can recommend this product.
More information: https://reversemate.com/


